Preview:
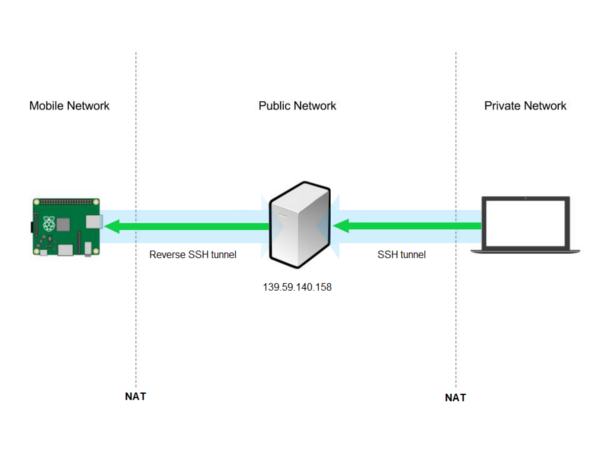
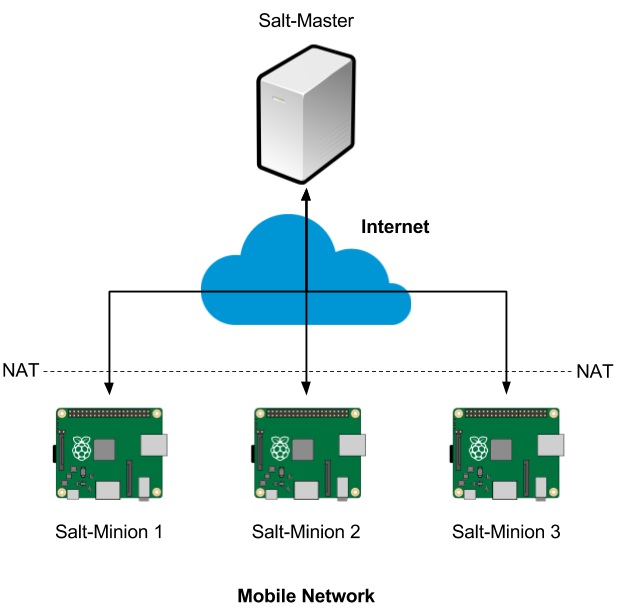
One of the main requirements for this project is to have a reliable method for managing our prototype remotely. The problem is that the device is in a mobile network behind NAT, which means that accessing it regularly via normal SSH is not possible since it does not have a static public IP-address that we could connect in to.
We discussed different ways we could approach this: a reverse SSH tunnel connected from the Raspberry Pi to the server would eliminate the problem with NAT, as our server is accessible by a public IP-address ,whereas the connection would not work the other way around. We also thought about using remote configuration tools like Puppet or Salt.
In the end, we decided that SSH is the most versatile way to go about this. However, we have to figure out how taxing it is in terms of resources. After all, our Raspberry will be running of a battery in a mobile network. Whether we are going to use this approach in late production, depends on the reliability of the connection.
Testing a reverse tunnel manually:
So the idea is to start the tunnel connection from the Raspberry Pi. To begin with, I tested how the reverse tunnel worked manually.
ssh -N -R 2222:localhost:22 markus@139.59.140.158
The connection was refused. This was because the server was not currently allowing connection to port 2222.
This is when I logged in to our public server, which we’re currently trying to connect to from the Pi. There, I first made a hole in the wirewall to allow incoming connections to port 2222:
sudo ufw allow 2222/tcp
After that, I went back on the Raspberry Pi and tried the ssh command above with promising results.
I was prompted that the authenticity of the host can’t be established and was asked whether I wanted to continue connecting, which was completely normal. After answering “yes”, I typed in the user markus’ password. After that nothing happened visually, the terminal was just waiting for something to happen.
Back on the server, I typed in the following command:
ssh -l pi -p 2222 localhost
I was prompted for the Pi user’s password and after a successful authentication, I was logged in to the pi.
So the reverse SSH was working!
Essentially what’s happening here, is that the public server is listening on port 2222 for incoming SSH connections. When a connection is received, it is forwarded to the previous connection that was established already from the Pi’s side. So, when the tunnel is up, connecting into port 2222 of the server is redirected to the Raspberry Pi.
Automating the process:
In order for this to make any sense, I had to make sure the Pi is automatically creating the reverse SSH tunnel at all times. I did this with a simple shell script which is then run every minute by a Cron job.
SSH key pair
First order of business, was to generate SSH keys for the Pi and the server. Otherwise, is makes running the script successfully more complicated when the Pi is prompted for the server user’s password. I wanted to avoid this so I generated a key pair: private key for the Pi and public key for the server.
On the Raspberry Pi:
cd ~/.ssh
ssh-keygen -t rsa
When asked, I did not create a passphrase. After the keys were generated, I transferred the public key “id_rsa.pub” to the server with scp:
scp id_rsa.pub markus@139.59.140.158:.ssh/authorized_keys
Now, I am no longer prompted for a password when connecting from the Pi to the server.
Shell script for connection
I made a shell script called “remoteconnection.sh” for automating the connection. It’s worth noting that I added something to the ssh command: -o BatchMode=yes makes the connection fail if auth keys are not setup correctly. -f means that ssh will background itself after authentication.
#!/bin/bash
# Script for creating a reverse SSH tunnel from Raspberry Pi to the server

        ssh -f -N -o BatchMode=yes -R 2222:localhost:22 markus@139.59.140.158
Now, the script should be ready to go. Before scheduling a Cron job, I tested it manually by running the script. However, before I could run it, I had to make it executable with:
chmod 700 ~/remoteconnection.sh
Then ran the script:
./remoteconnection.sh
SSH begun to run on the background and I was not prompted for a password. On the server side, I connected again with the same command as earlier:
ssh -l pi -p 2222 localhost
After typing in the Pi’s password, I was in.
Cron job for running the script
For initial testing purposes, Cron is running the script every minute. I want to be able to access the Raspberry Pi at all times. Not having to wait for 15 minutes before being able to connect for example.
On the Pi I edited Cron jobs with:
crontab -e
and added in the following line:
*/1 * * * * /home/pi/remoteconnection.sh >/dev/null 2>&1
By default Cron likes to send the output of running the job to the user’s email address. I avoided this by adding in the “>/dev/null 2>&1”.
Our Pi should now create a reversed SSH tunnel every minute, if the tunnel is not already setup.
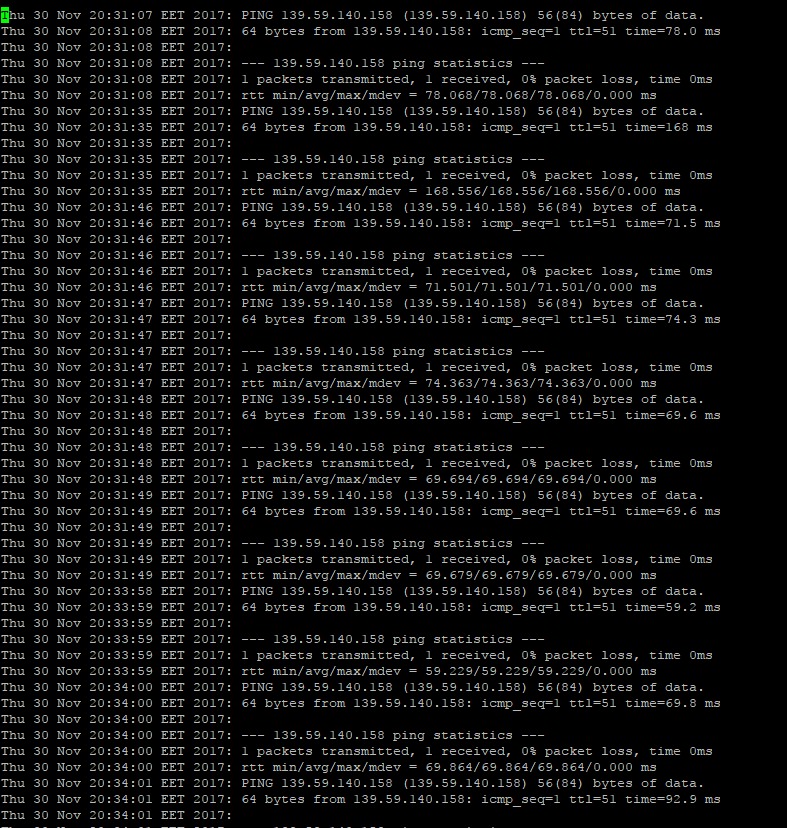
I checked to see whether Cron was actually running the script at all. Log details were found on /var/log/syslog
sudo tail -F /var/log/syslog
And I was pleased to see that it was indeed run every minute by Cron:
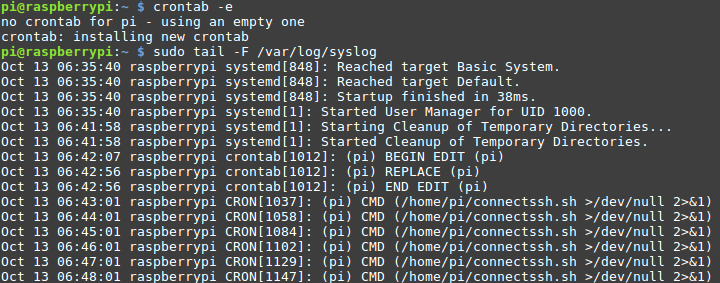
(The picture above is a bit old, therefore, the script name is different but the results are the same.)
Testing the connection:
During testing, I noticed that after rebooting, the connection was not always successful automatically. I often had to log in to the Pi and manually start the script for it to work. Even then it was a hit or miss. When it worked however, the Pi really seemed to maintain the connection very reliably. It’s just that after rebooting the device, Remote port forwarding fails to listen port 2222.
I realized that this is because after old connections have dropped, the server port 2222 is still waiting for them to reconnect. To fix this I made a script to kill old processes that are using port 2222 on the server.
#!/bin/bash
# Script for killing old connections to port 2222. Run this after remote connection is over.
# Note! This is run on the server! You can check if (CLOSE WAIT) connections are still alive with: "sudo lsof -i TCP:2222".

sudo lsof -t -i tcp:2222 -s tcp:listen | sudo xargs kill
To check whether old connections are still in (CLOSE, WAIT) state, you can use the command:
sudo lsof -i TCP:2222
Now everytime I want to remote connect to the Raspberry Pi, I first check whether connections are still waiting and if they are, then kill them with the script above. After that, I’ll just have to wait for the Pi to reconnect (which it does every 1 minute).
Another “problem” we discovered, was that the mobile network causes a very notable latency when remotely connecting to the Raspberry Pi. Everything is remarkably delayed but still functional.
A week back, we were not attending the school during a holiday, which gave us a good opportunity to test the reliability of the mobile connection and our remote management tools.
We left the Raspberry Pi running on the mobile network for over a week. Every day we tested the remote connection twice and every attempt was successful.
It’s not perfect but it’s working. Now that the course resumes, I’ll be developing this further to make sure it’s reliable and works immediately at startup.


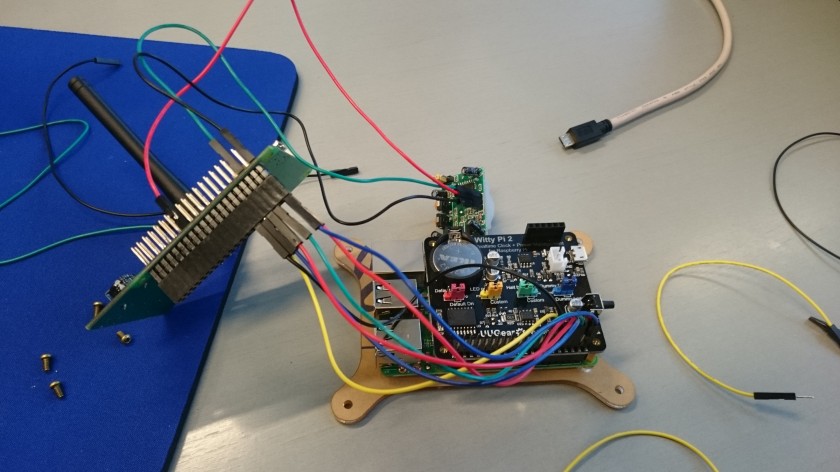
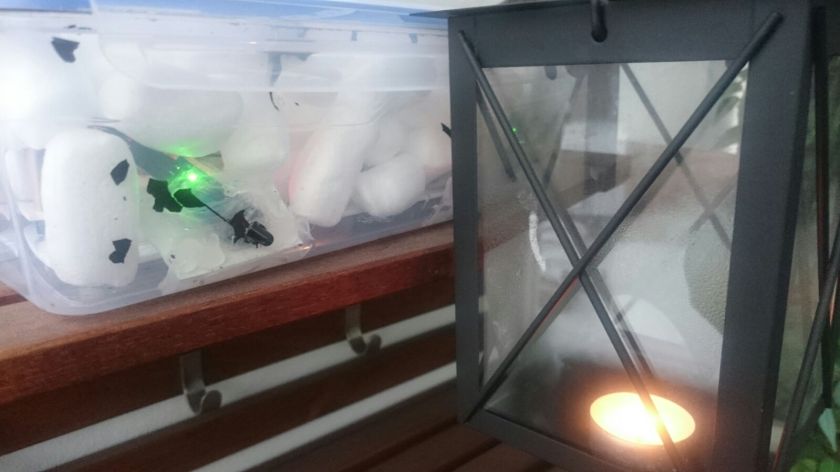 Prototype on the balcony.


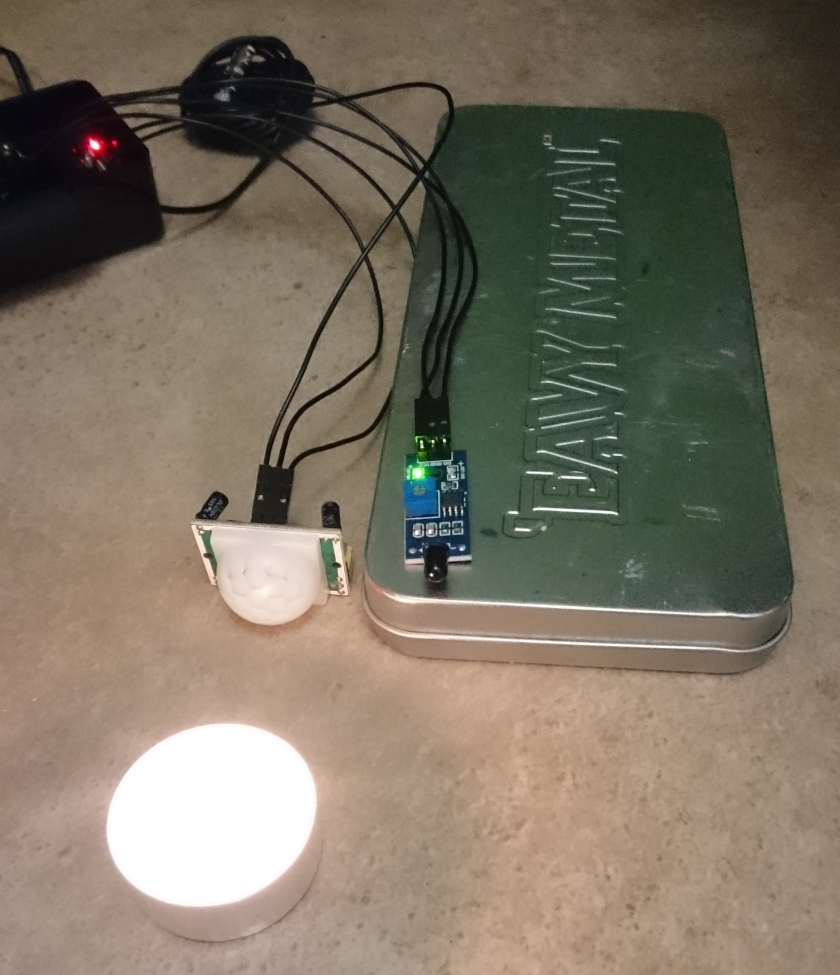
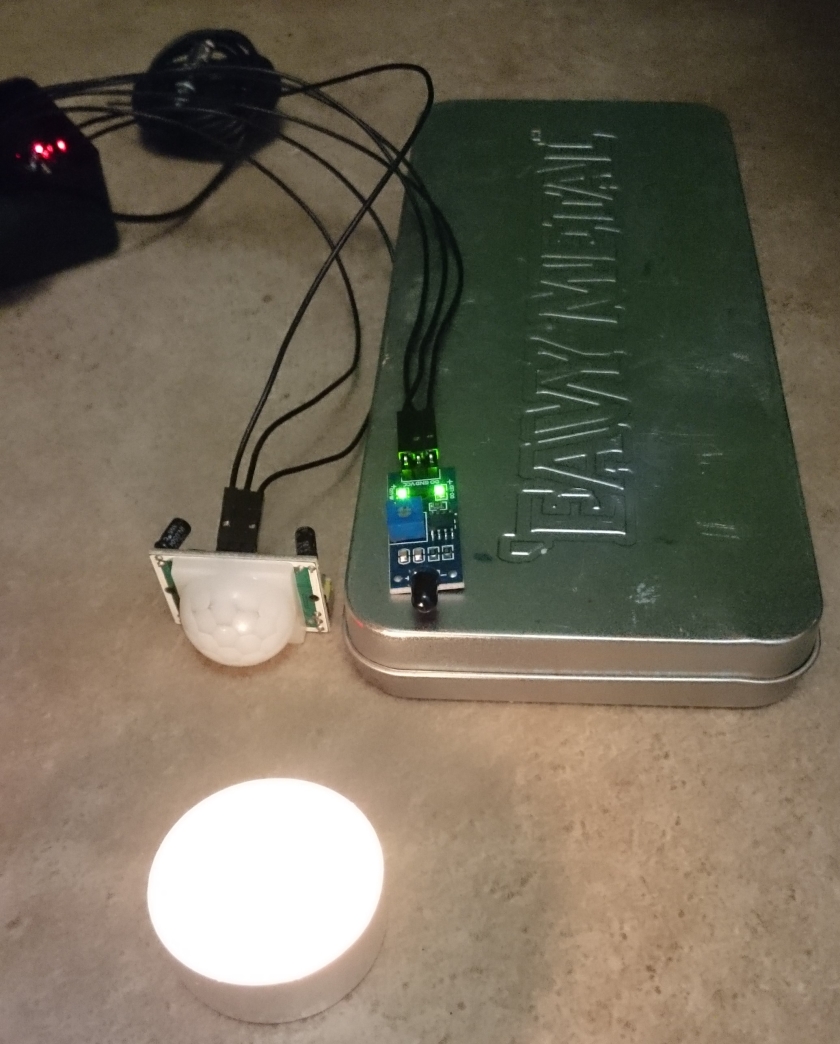

 picture 1. the box.